
Shop the edit
View collection


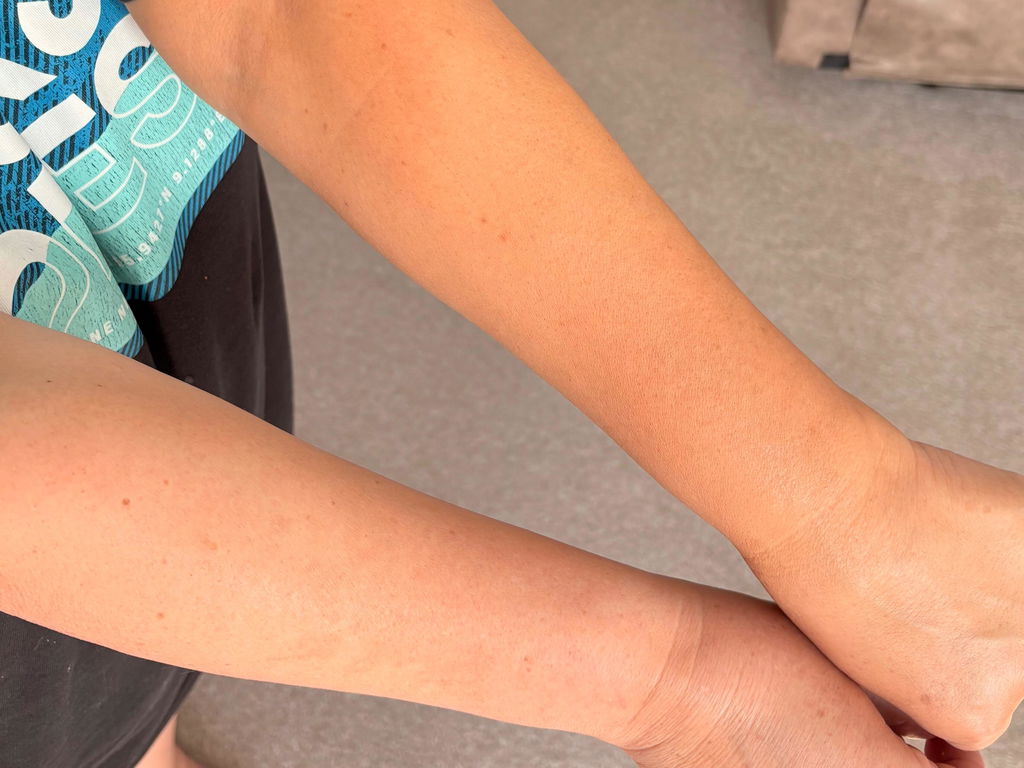
Hands, feet, elbows and ankles are the places where even seasoned tanners tread carefully. The skin is thinner in some areas, drier in others, and full of contours that can collect excess formula. The result? Tell-tale darkness around knuckles, patchy heels and overly tanned elbows that give the game away. The good news is that a beautiful, natural-looking blend is absolutely achievable with the right prep, the right product textures and a few pro-level blending habits.
This step-by-step routine is designed specifically for tricky zones, whether you’re using a mousse, lotion, water or a gradual tan. It’s written for real life: quick, skincare-led, and easy to repeat weekly. Keep your mitt to hand, bring a soft make-up brush into the mix, and get ready for soft-focus hands and feet that match the rest of your glow—seamlessly.
Why tricky areas behave differently
Understanding the skin helps you adapt your technique. Hands and feet are constantly washing, rubbing against fabric and exposed to the elements, so they can grab or lose colour faster than the rest of the body. Elbows and ankles, meanwhile, are typically drier and have more texture, which can cling to product.
- Dryness increases absorption: Parched patches drink in more tan and look darker.
- Texture collects product: Fine lines, knuckles and heel creases trap excess formula.
- Frequent washing fades faster: Palms and the tops of hands lose colour quickly through handwashing.
Addressing each of these factors is the secret to a believable, even result.
Your 24-hour prep plan for flawless edges
24 hours before: gentle resurfacing
- Buff, don’t scrub raw: Use a soft body polish or an exfoliating mitt in the shower, paying particular attention to elbows, wrists, ankles and heels. Aim for smooth, not sensitised.
- Nail prep: Trim and shape. Push back cuticles gently. Apply a light coat of clear polish if you wish to shield nails from tint transfer.
8–12 hours before: hydration mapping
- Moisturise strategically: Apply a lightweight, fast-absorbing lotion over hands, wrists, elbows, ankles and feet. Let it sink in fully—glow looks smoother on supple skin.
- Spot-soften: Tap an extra dot onto knuckles, cuticles, side of the feet, back of the heel, and any scaly spots on elbows. This creates a subtle barrier and prevents overdevelopment.
Top tip: If your skin is routinely dry or sensitive, consider using a gradual formula on tricky areas even when you use a deeper mousse elsewhere. A buildable approach gives you control over intensity.
Product choices that make hands and feet easier
The formula you pick changes how you apply:
- Mousse: Great slip and fast application; use the absolute tiniest amount on tricky areas and blend quickly with a mitt or brush.
- Lotion/gradual lotion: Hydrating and forgiving. Excellent for hands, feet, elbows and ankles when you want soft, buildable colour.
- Water/clear serum: Lightweight and clean-feeling; apply with a careful hand and buff edges promptly as there’s no guide colour.
- Instant body makeup: For last-minute plans, wash-off finishers like Body Blur can perfect tone and blur texture without commitment.
Vita Liberata favourites to consider in your routine include Fabulous Gradual Tanning Lotion for controlled colour, Fabulous Self Tanning Mousse for a fast, even glow, and Body Blur for instant skin-finishing that rinses away.
The foolproof application routine for hands, feet, elbows and ankles
1) Start from the larger areas and work inwards
Apply your tan to arms and legs first using a clean tanning mitt. Once you’ve blended from shoulder to wrist, and from thigh to ankle, you should have only a trace of product left on the mitt. That final whisper is what you’ll use on the tricky zones.
2) Create a subtle moisture barrier
Before touching the tricky areas, dot a pea-sized amount of fragrance-free lotion onto the following high-grab points: knuckles, cuticles, the sides of fingers, elbows (especially the very centre), the backs and sides of ankles, and the rougher parts of heels. Tap to blend so it’s invisible; you’re softening, not greasing.
3) Hands: micro-dosing and brush blending
- Backs of hands only: Curl fingers into a loose fist so knuckles are smooth. Using the residual tan on your mitt, sweep lightly over the backs of hands and around the sides, avoiding palms.
- Switch to a soft brush: Take a clean, fluffy face brush (dedicated to tanning) and pick up the faintest hint of product from the mitt. Feather over knuckles and between fingers for a light, even haze.
- Wrist fade: Hold your hand flat. With the clean edge of the mitt, buff the wrist crease in tiny circles so colour fades seamlessly into the forearm.
- Nails and cuticles: Immediately wipe nails and cuticles with a slightly damp cotton bud or pad.
4) Feet: less is more
- Top of foot only: Flex your toes upward. With residual product on the mitt, sweep once over the top of the foot and once across the bridge.
- Avoid saturation: Do not load formula directly onto the mitt for feet; if you need a touch more, transfer from shin to foot by gentle buffing.
- Toe webs and nails: Use a clean brush to haze a whisper of colour between toes, then immediately wipe nails and toe webs with a damp cotton bud.
- Ankle ring blend: With a clean section of mitt, buff all the way around the ankle bone in small circles to diffuse any line.
5) Elbows and ankles: blur the centre outwards
- Elbows: Bend the elbow slightly to smooth creases. Tap-buff with residual product and finish with a clean brush to haze the very centre.
- Heels and outer ankle: Use what’s left on the brush—never a fresh pump or dollop.
6) Final clean-up
- Palms and sides of hands: Wash with a tiny dot of soap on a nail brush or cloth, focusing on creases. Rinse hands quickly and pat dry—don’t splash up onto the wrists.
- Knuckle check: If any knuckle looks darker, tap over it with a clean, slightly damp mitt to lift excess.
Timing your development window
Every formula develops at its own pace. As a general rhythm:
- Gradual lotion: Subtle colour within 4–8 hours; layer daily until you reach your shade.
- Mousse: Deeper colour across 4–8 hours; rinse guide colour (if present) when advised by the product instructions.
- Water/clear formulas: Typically 4–8 hours with no visible guide; be precise with buffing.
Hands and feet often don’t need the full development duration to look balanced. If you’re rinsing your tan earlier for a lighter result, try removing the colour from hands and feet 30–60 minutes before the rest of the body by wiping over with a damp cloth, then patting dry. This keeps edges soft and natural.
Shade and undertone: matching hands and feet to the rest of you
If your face is naturally lighter or you wear SPF diligently (bravo), your hands may need a slightly gentler approach than your forearms. Consider these tweaks:
- Go half a shade lighter on hands and feet than on legs for a polished, editorial look.
- Prefer gradual lotion for tricky zones when using mousse elsewhere; it gives you better control over depth.
- Balance with instant finishers: If legs look deeper after rinsing, a sheer layer of Body Blur on feet and ankles brings everything back into harmony for a night out.
Common mistakes—and easy fixes
Too dark on knuckles
- Immediate fix: Mix a pea-sized amount of regular body lotion with a drop of facial cleanser. Massage over the area for 60 seconds, then wipe. Repeat lightly if needed.
- Tomorrow’s fix: Lightly exfoliate with a damp flannel, then apply a tiny amount of Fabulous Gradual Tanning Lotion to the rest of the hand to rebalance.
Patchy ankles
- Immediate fix: Dab a bit of lotion onto a cotton pad and buff the patchy area in circles to diffuse edges.
- Blend-back: Use a clean brush with a hint of gradual lotion to haze colour around the ankle bone for a soft edge.
Orange tone on dry elbows
- Rehydrate, then recalibrate: Apply a rich, fragrance-free moisturiser twice daily for 24 hours. The next day, use one sheer coat of gradual lotion just around the elbow, tapping in with a brush for a neutral, even tone.
Pale palms from over-washing
- Targeted top-up: With a barely-there amount of gradual lotion on a brush, feather colour only along the outer edges of the palm and sides of the hand—avoid the centre.
Maintaining your result: the weekly rhythm
Your most believable tan is the one that fades like skin does—softly and evenly. Build your week around these light-touch habits:
- Moisturise daily: Hydrated skin keeps colour smoother for longer. After every hand wash, reapply a small amount of hand cream to the backs of hands.
- Top up gradually: Every 2–3 days, add a whisper of Fabulous Gradual Tanning Lotion to hands and feet using a brush for a second-skin glow.
- Mind the wash-off: Frequent washing and sanitisers fade hands. Consider a light layer of Body Blur for evenings out; it resists minor splashes and rinses away at bedtime.
- Exfoliate smartly: Midweek, use a mild polish on elbows, ankles and heels to prevent build-up before your next application.
Face, wrists and necklines: joining the dots
Even if your face-tan routine is separate, connection points should read as one. After applying your face product, look at:
- Jaw to neck blend: Buff lightly under the jawline and behind the ears.
- Neck to chest: If you tan your chest, smooth a tiny amount over collarbones so there’s no sudden shift at the neckline.
- Wrists: The tiniest circular buff with a clean mitt where watch straps sit keeps colour subtle and believable.
For face, try a sheer, skin-enhancing step like Beauty Blur on makeup days. It softly perfects tone so the hands and face match in finish, not just shade.
Event-proofing: what to do the night before a big occasion
- Check edges under different light: Bathroom, daylight and warm evening light can show different things. Buff any edges gently.
- Instant finishing: If needed, apply Body Blur on shins, ankles and the tops of feet for a photo-ready finish that blurs texture.
- Nail tidy: Swipe cuticles with oil and blot any excess before slipping on shoes or jewellery.
- Clothing test: If wearing lighter fabrics, make sure development time has fully elapsed and you’ve rinsed any guide colour if your chosen product includes one. Pat dry thoroughly after rinsing.
Technique boosters that change everything
- Use two tools: A mitt for laydown, a soft brush for feathering. This combo gives professional diffusion with minimal effort.
- Always work with residue: Fresh product is for large areas; residue is for edges.
- Map your moisture: The pea-sized lotion barrier is the difference between soft haze and overdeveloped patches.
- Count your strokes: One or two passes per area, then stop. Overworking can push product into lines.
Seasonal tweaks for tricky zones
Winter
- Extra hydration: Central heating dehydrates skin. Layer a hyaluronic-rich hand cream on the backs of hands before bed.
- Choose lotion textures: Opt for gradual lotion on hands and feet to prevent overgrab on dry patches.
Summer
- SPF always: Sun protection on the backs of hands protects both your skin and your carefully blended colour.
- Top-ups little and often: Heat and frequent washing can fade faster; micro-top up with gradual lotion as needed.
Travel-proofing your routine
On the go, keep it minimal and mess-free:
- Pack a mini mitt and brush: They weigh nothing and make precision simple.
- Choose a buildable hero: A travel-size gradual lotion can maintain hands, feet, elbows and ankles without drama.
- Instant insurance: A small tube of Body Blur rescues last-minute outfit changes and evening plans.
Putting it all together: a quick-reference routine
- Prep 24 hours before: Gentle exfoliation and nail tidy.
- Hydrate 8–12 hours before: Moisturise tricky zones, spot-soften high-grab points.
- Apply to limbs first: Use a mitt; leave only residue for edges.
- Hands and feet: Residual product + soft brush; wipe nails/cuticles immediately.
- Elbows and ankles: Tap-buff with residue; haze with clean brush.
- Clean-up: Quick palm wash; pat wrists dry; knuckle check.
- Maintain: Daily moisturise; gradual top-ups every 2–3 days; gentle midweek polish.
With these techniques—and by selecting forgiving, skincare-led formulas—you’ll transform the areas most likely to give your tan away into the ones that quietly perfect it. Whether you lean on the buildable glow of Fabulous Gradual Tanning Lotion, the quick payoff of Fabulous Self Tanning Mousse, or the instant polish of Body Blur, your hands, feet, elbows and ankles can look as naturally sun-kissed as the rest of you—no streaks, no patches, just seamless radiance.